Pages

Wednesday, 3 October 2012

42 YEARS TODAY!


Good morning to you,

Today, George and I have been married for 42 years. It is hard to believe we have been married for so long, as  we both agree the time has flown by.

We are enjoying a wonderful life together. As with all  marriages we have had our share of  "ups and downs", but when there have been "bumps in the road", we have managed to overcome them together.

We have two wonderful daughters which we are so grateful for and love dearly.
  
   
 ...and look what arrived for me today, George sent me these beautiful roses, to celebrate our anniversary,  they  are absolutely gorgeous.
  

  I thought you would like to take a  closer look at the roses.


....and this is the vase the roses were in.  

The vase is a beautiful shade of blue and do you see the metal work around the top, this has been handmade.  It is so beautiful, the metal work reminds me of a design from the medieval times.


And this is where it all began 
with George and Daphne 
 
 Our Wedding Day 3rd October 1970
outside the church
  
  Our honeymoon in Majorca, look how young  we were.  I'll share a secret with you. As you can see George was very fit.  When I was tired of pedalling I would put my feet up on the cross-bar and let George do all the work.  I don't think he ever noticed, well if he did, he was kind enough not to say anything.
Three years later, along came our gorgeous daughter Natasha.  In this photograph she was two weeks old.   There was great excitement when she was born, because she was the first grandchild on both sides of the family.

  Then four years later in 1977 along came our youngest daughter, Danielle.  Wasn't she a cutie pie.  She grew up with a twinkle in her eye.
  
This is Natasha when she was five years of age.  She was the most sweetest natured little girl. 

This is Danielle aged 5 years.  She was a mischievous little girl and full of fun, but I think you can see that in her eyes.


 ......and here are our gorgeous girls and Phyllis' grand daughters, as they are today, all grown up and beautiful. 

.....and all because George and I met one day at a summer fete in 1967.

I hope you have enjoyed these pictures of our family.

We are now going out to celebrate our anniversary.

Take care and I will see you later in the week.

Best Wishes


Daphne xxx


Sunday, 30 September 2012

GREEK MOUSSAKA

Good Morning to you,

The skies are very dark and the clouds look thunderous. The wind is howling outside and the rain is bouncing off the pavements.  The weatherman says the wind and rain is set to remain for the rest of the day and could actually continue for the next couple of days.  I am lucky because today, I am in my warm and cosy  kitchen, so I have decided to ignore the horrible weather and make the Moussaka I promised you I would make.

First things first, a  cappuccino is in order, then I will organise  the ingredients  and finally I will find some good music to listen to whilst cooking.  Once this is done, I am well and truly ready to start making Moussaka.


 THE INGREDIENTS


PLUS

Cinnamon 


PLUS 

1 additional aubergine (total 3 aubergines used)


2-3 large aubergines (I needed to use 3)
 2 medium sized onions
2 to 3 cloves of garlic (depends on your taste)
olive oil
1kg minced lamb
1 1/2 glasses of red wine (optional)
1 1/2 tablespoons of tomato puree
1 400g tin of tomatoes (chopped)
or if you prefer use fresh tomatoes
1 teaspoon of sugar
2 teaspoons of cinnamon
1 1/2 tablespoons of dried oregano
salt and pepper
1/2 pint of water

1 x 12" by 9"  dish that can be used in the oven


Top and tail the aubergines then  slice the aubergines length ways.

Brush both sides of the aubergines with olive oil and place in a dry pan. Cook until brown on both sides.


 Remove from the pan and set aside until needed


 Cook the lamb mince until the pinkness has gone, then remove from the pan into a dish and set aside until needed.


 Place two tablespoons of olive oil in a pan. Add the onions and cook until translucent.

Add the grated garlic, oregano and cook for a further couple of minutes

Add the cooked lamb mince back into the pan, a little at a time, to allow  all the ingredients to be incorporated.

Add the cinnamon, salt and pepper and stir well.


 Add the chopped tomatoes, tomato puree,  red wine, sugar and water to the meat mixture and stir again. Bring to a simmer,  place a lid on the pan and leave to simmer for about 50 - 60 minutes. Check for seasoning, if more is needed add now and stir. You want the consistency to be quite thick, with very little liquid, so if you still have a lot of liquid left after 50 minutes, remove the lid and  increase the heat to allow the liquid to evaporate.  Stir occasionally, when you reach the required thick consistency, remove from the heat  and set aside.

THE INGREDIENTS FOR 
THE 
CHEESE SAUCE 


 75 g  butter
75 g  flour
750 ml of milk
75 g grated Kephalotiri Cheese
 (if you are unable to buy this Greek cheese, Parmesan  mixed with a little cheddar cheese is a good substitute)
1 egg plus 1 egg yolk
sea salt and  black pepper 


 Melt the butter in a pan and stir in the flour. Keep stirring and allow the mixture to cook for about a minute. This is to make sure the flour is thoroughly cooked.  Add the milk and whisk vigorously with a balloon whisk.  I find the white sauce does not turn lumpy as long as you keep whisking.  Takes a little while, but persevere and you will have a luscious thick white sauce.

Remove from the heat and add the cheese, salt and pepper, keep mixing until the cheese has melted. Check the seasoning, again if more is needed add now and stir for a minute or so. 


Allow the sauce to cool a little, I would say about 3 minutes. Whisk the eggs and slowly pour them into the mixture,  beating to  fully incorporate the eggs.   Make sure your sauce is not too hot, otherwise your eggs will scramble. 


You will now have a rich, creamy sauce. 


 Using Olive oil, brush the baking dish. Place a layer of aubergines at the bottom of the dish, then add the meat sauce on top of the aubergines.

Continue layering in this manner. I found I had a couple of sliced aubergines over, I did not want to waste them so I added them to the final layer of meat sauce.


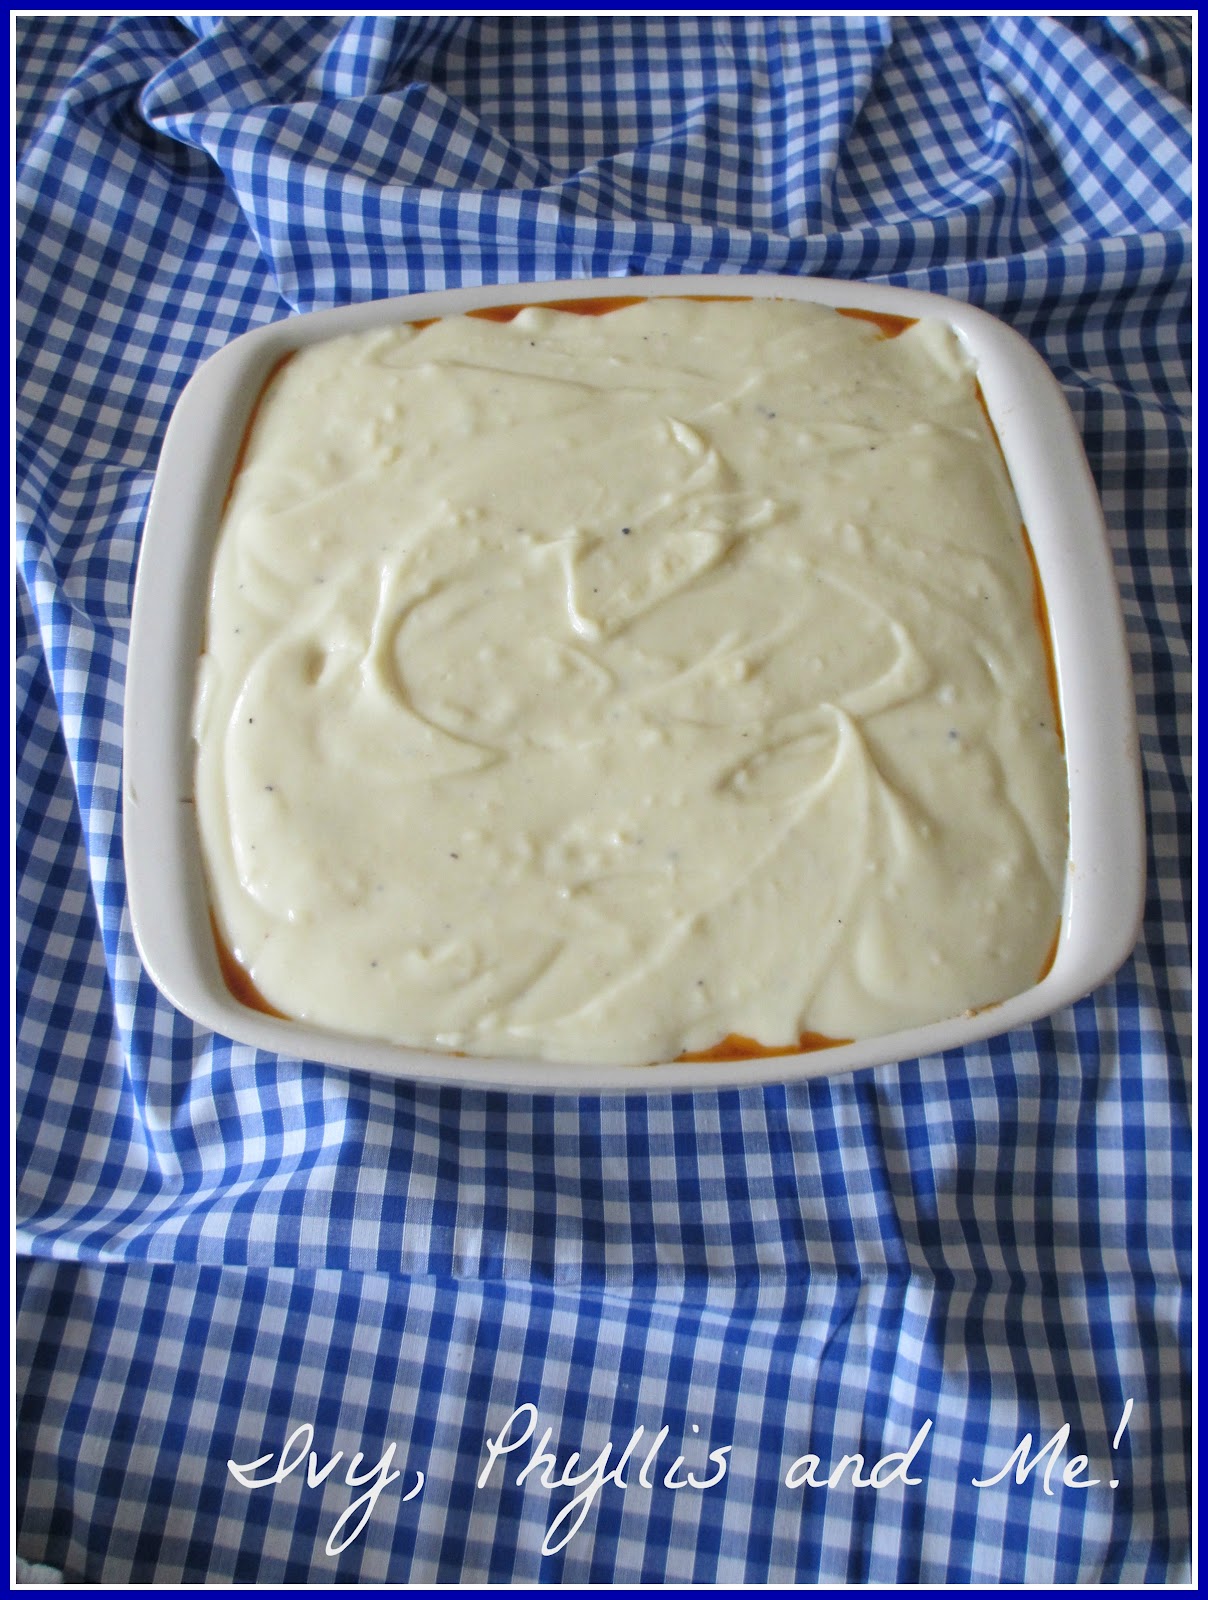
Pour the white sauce over the meat mixture, making sure the meat is entirely covered. 

Bake at 140 C  for 50-60 minutes until golden brown.

Ovens do vary and I found  this took 45 minutes in my oven.
  

There is the option to add another layer to this dish, by using sliced potatoes. 

Par-boil your potatoes and allow to cool as this makes the potatoes easier to slice. Slice the potatoes the same thickness as the aubergines. Then alternate the layers, aubergines, meat mixture, then  potatoes.

If you decide to add potatoes, then don't allow the meat mixture to be too thick in consistency, leave some liquid, as the extra liquid will allow the par-boiled potatoes to fully cook when baking the Moussaka in the oven.
I hope you try this recipe.  It does take a little time, but believe me it is worth it.  Just a thought, if you are short of time, you could cook the meat mixture one day, then the aubergines and potatoes and cheese sauce the following day.

So, Dimi, what do you think, I would love to know.

This week I shall be joining,

Yvonne from StoneGable for On the Menu Monday 
Alli for Throwback Thursday 
  
Have a lovely week and I will see you later.  Take care until then.

Best Wishes
Daphne xx

Wednesday, 26 September 2012

IT'S PESTO TIME

Good Morning to you,

A few weeks ago, I shared with you  how easy it was to increase your supply of basil plants, by rooting stems in water. See here.

Well now is the time to do something with those  plants before the mornings become any colder and we lose our basil plants to the morning frosts.


 Pesto which you make yourself has a far superior taste to anything you can buy in the shops, and of course the added bonus is that you know exactly what has gone into yours....no additives, which can only be good.

This is such a simple recipe. The hardest thing  for you to do, is use your arm muscles to finely grate the cheese and use the gas hob to  toast the pine nuts, then the food processor does the rest.


INGREDIENTS

2  large handfuls of fresh basil leaves
  (stems included)
1 or 2 cloves of garlic
(depends on your taste)
50g pine nuts, lightly toasted
100g parmesan cheese, finely grated
1/4 pint of olive oil
Sea salt and pepper


Lightly toast the pine nuts in a dry pan.
(Do not add oil)

Keep a sharp eye on them, because the pine nuts will brown very quickly and are easily burnt.

Toss a few times until lightly golden


 Place the basil, garlic and pine nuts into a blender.


Pulse a few times until the ingredients are finely chopped.


 Add the olive oil and pulse again.
If you prefer a looser consistency,  add more olive oil at this point.


 Add the sea salt and black pepper


 Add the grated Parmesan Cheese


Pulse again, until fully incorporated 

Just as an added extra, you know my love of lemons, well I must confess I do add a squeeze or two of lemon at this point, but this is optional.
Taste to check the seasoning, add more if required. 


Now , your pesto is ready to use. It really is that quick.
I put my pesto in a jar, which has been sterilised and I also add a layer of olive oil on the top. 
Keep the pesto in the fridge until needed.
Just as an added note, remember pesto has a very strong flavour, so use sparingly as you can spoil your dish by using too much. As I am always saying with cooking, it's easy to add a little at a time, but you can't take away.
Take care and I'll see you later in the week.
I shall be joining,
  
Best Wishes

Daphne xxx

Sunday, 23 September 2012

MY FIRST COOKERY BOOK

Good Morning to you,

Can I ask you a question? 

Do you remember the  first cookery book you bought?

You do. Tell me,  how did you feel when you held the book in your hands?   Were you excited to recreate the recipes the book offered?  Were you seduced by the photographs? Were you "champing at the bit" to read the book from cover to cover?

What I am really describing is how I felt. I remember  all of these feelings and I couldn't wait for my culinary adventure to begin.


Here it is.   I felt nothing less than a book entitled  International Cookery Course would do. As a newly wed, I wanted to impress George with what would be, my newly acquired, exotic culinary cooking!


Remember this was 1970 and cookery books were changing.    Can you imagine  jumping from Ivy's cookery book, which had 4 colour plates, to Phyllis' which had a few more colour plates than Ivy's, to a cookery book which was full of brightly coloured photographs and so much detail. Not only that, but  filled with exotic foods.

I was ensnared. No more plain cooking for me. I was going to be an exotic cook (remember I was very young).... and so my love of food from around the world began.


Greek food is still one of my favourites and  Moussaka is delicious. The sights and sounds of Cyprus come flooding back when the aroma of Moussaka fills my kitchen.  Cooking Moussaka and listening to a little Greek Music makes me a very happy person.


Tourtiere is a well known meat pie from Quebec and is traditionally served after midnight mass at Christmas.  This pie is spiced with cloves as well as mixed dried herbs, which I found unusual at the time.  You can't tell by the photo that it includes bacon, onion, potato as well as pie pork. George loves this pie as his father used to make him plate pies as a child and he says although not as thick as this Tourtiere, the pie his father made was very similar.  


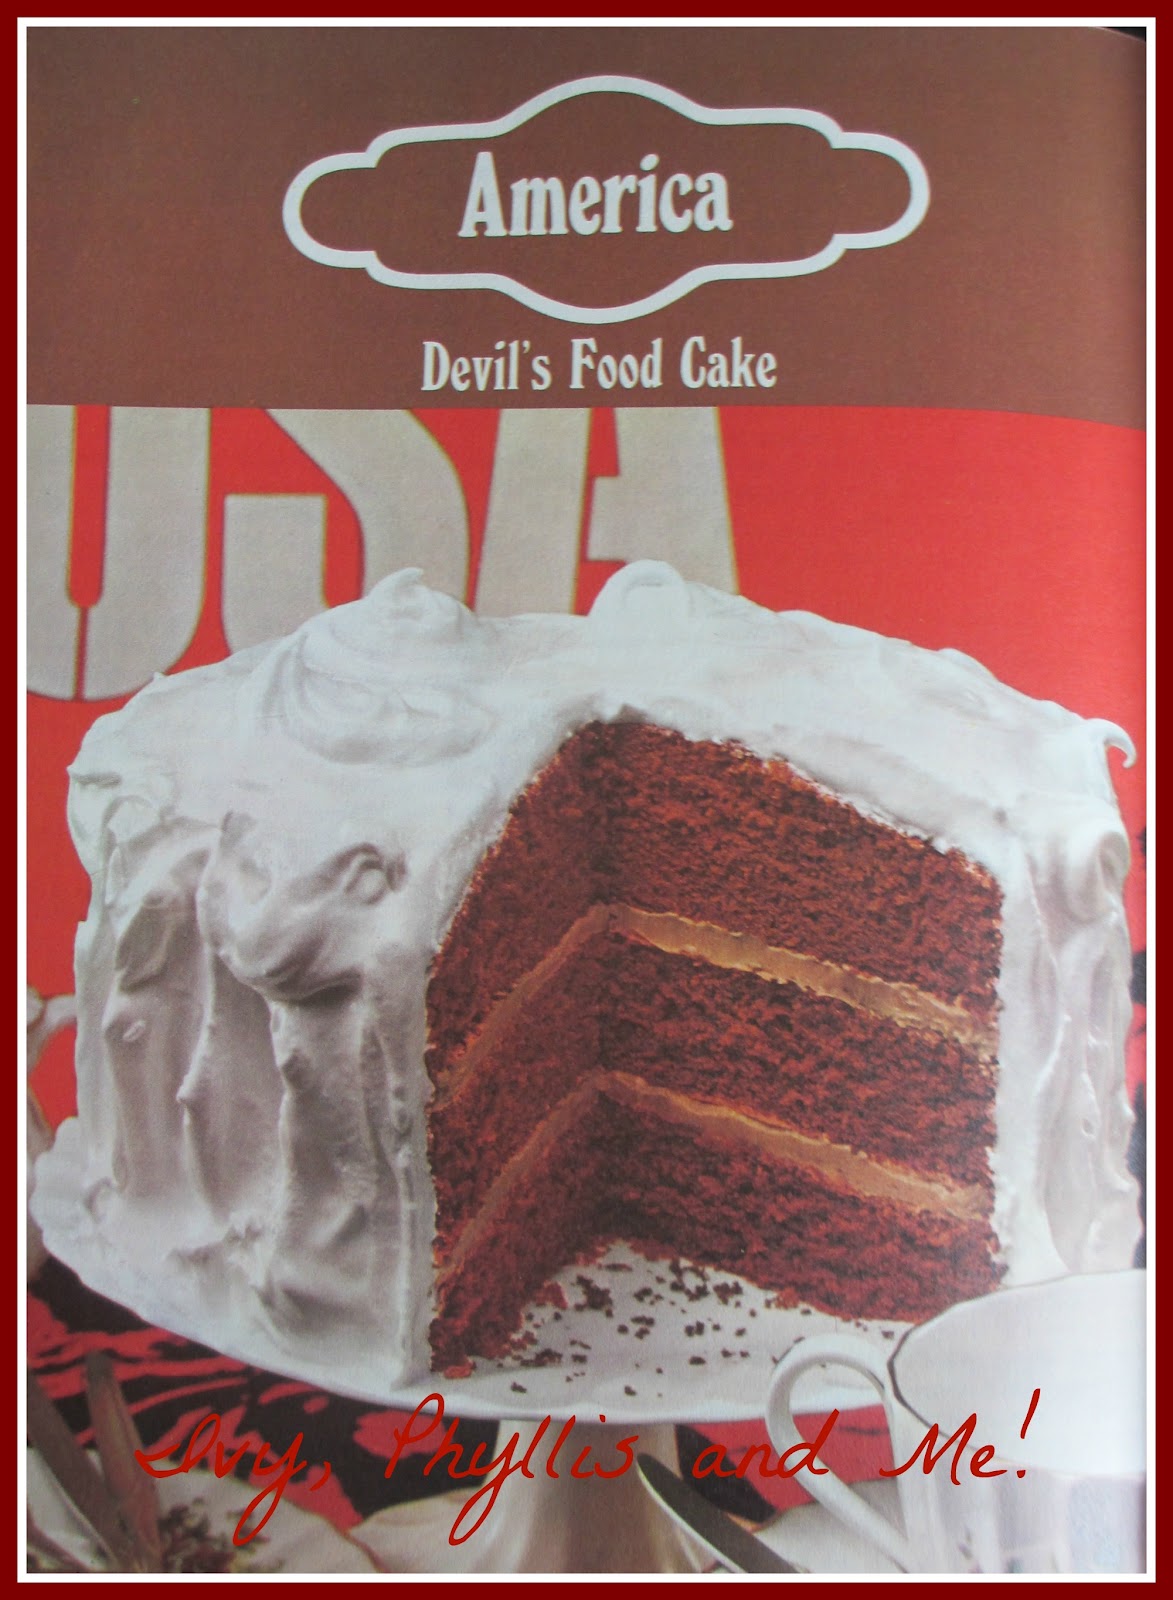
 Can you imagine how I felt when I first set eyes on this cake. No..... well I will tell. I couldn't believe that a cake baked at home could look so spectacular.  As you know Ivy was a skilled baker, but I had never seen anything baked as large as this magnificent cake. I couldn't wait to bake it.   The first time I baked it I had to share it with friends as  the two of us would have been eating it forever more.  My friends were impressed with this cake and so was I. After my first attempt I kept this cake for special occasions.


Does anyone remember making Beef Stroganoff? (That question is for the Diamond Jubilee Children!) This was a very popular dish if you were having a dinner party.   In the '70's we didn't say we would invite friends for supper,which is a much more relaxed affair.  We invited them to a dinner party which was very formal. We dressed for dinner and minded our P's and Q's.   Nowadays things are a lot less formal and much more relax which I prefer.


.....and who didn't make Goulash in the '70's, especially during the winter.  It is such comforting food.   The important ingredient in this recipe is paprika, which can be bought in abundance now, but again it wasn't so readily available back then.  Can you tell this has been a well used recipe over the years. See the marks on the photo, some ingredient or other  was splashed on the page when I was making this dish and you can see where I tried to wipe the mark away.


This Potato Soup with Dumplings is a recipe  used time and time again.  This soup we enjoy for supper as it is filled with carrots, leeks, celery,onions, bacon and salami and is a very hearty, warming soup.


....and now to Spain.  The omelette I was used to, was a  little  French rolled omelette, using  two  eggs and filled with grated cheese, but this was a giant in the world of omelettes. When I came across these tortillas I didn't imagine I would make them as they were so large and far too much for two people.  But when George spotted them they became one of his favourites, as in his youth he did a lot of sport, especially judo and canoeing which took great amounts of energy, so these Tortillas  became a regular in my repertoire of cooking.


Look at that beautiful picture, at the time, there was nothing more exotic than an Indian Curry. The information about making Chicken Curry said,  "Spices and ingredients for curry, including poppadoms, are available in high-class grocery stores ".  mmm didn't know any high-class grocery stores back then, so this dish wasn't made for many years.  Nowadays,  the spices I use  come from India. You can't be more authentic than that.


It was during the middle of the '70's that I was able to buy the ingredients for dishes such as Prawns with Mixed Vegetables and Crispy Pancake Rolls. At the time I felt my culinary education needed to be increased before I attempted these  dishes.  It took a while, but with practise I mastered these dishes and was rewarded with delicious new tastes to savour.
I hope you have enjoyed looking at recipes from way back when..... ok the 1970's.  I hope so, as I am going to recreate a few of the recipes for you.  The first one will be next Sunday, and I'll be cooking  Moussaka.... now, this will be fun as Dimi from Aussi Dimi Decoupage will tell me if I am making it correctly, but I have to say, I adapt recipes for our taste, so it probably won't be strictly correct, but it will be very tasty.
This week I will be joining,
 Green Day at Raindrops and Daisies
Take care and I will see you later in the week. 
Best Wishes
Daphne xxx 

Wednesday, 19 September 2012

SUMMER'S ABUNDANCE FOR WINTER'S SHORTFALL

Good Morning to you, 

 Do you remember, in August, when I showed you some photos of my garden,   I  included  the flowers which were growing on the Runner Bean plant.  I added this photo  as the flowers  were so vibrant and beautiful, I felt they had earned their place amongst the other garden flowers. 


Well, the months have passed, my plants have grown and  now I have a plentiful supply of runner beans.


I planted three plants, which were slow to grow because of the constant rain during June and July, but come August they started growing really well and because of this little plant I have an abundance of Runner beans. 


 Each plant has yielded about 1 kilo of Runner beans.

Once I started picking the Runner beans, they grew so fast that I had more than I could use, so I decided to freeze them in portions sizes, enough for us to eat at one meal. 
 
 I selected young, tender beans which I didn't allow to grow too big otherwise they would have become stringy and tough.


 I washed them thoroughly, then topped and tailed them (this means, trim each end of the bean). Then cut the beans into good sized pieces.  My Runner beans are chunkier than  Phyllis and Ivy's,  as they tended to cut theirs into a much slimmer shape, which made the beans look more delicate, but George prefers a chunkier bean.  He says this is a "man" sized bean!


 I then blanched the beans.  This is essential as blanching preserves the colour, the flavour and texture of the beans. I used 3 litres of water to every 500g of beans.

Bring the pan of water to a rolling boil and add the beans. I find it easier to add a couple of handfuls  at a time, as this allows the water to return to a rolling boil quickly. 


When 3 minutes has passed, (I would recommend you set a timer as it is easy to be distracted), remove the beans from the pan with a slotted spoon and plunge the beans into a bowl of iced cold water.  I use cold water from the tap then add about 12 ice cubes, this enables the beans to cool quickly to prevent over cooking and to allow the beans to retain their colour. 


Have your freezer bags to hand ready to fill with Runner beans.  Record the date the beans were frozen and add what the bags contain, in this case, Runner beans.


Add the beans to your freezer bags, as much or as little as you prefer, but not more than three quarters full.  I tend to freeze enough for one meal. 


Remove as much air as you can from the bag and seal. Your beans are now ready to freeze to enjoy during the winter time. 


I place the beans into the freezer and lay them flat as this helps to freeze them much quicker.  I can stack them once the beans have frozen.

  
And all because of this wonderful flower.... and not forgetting the pollination by the bees.


Now, I want to say,

a big thank you to Linda from Life and Linda who wrote a great post about watermarking photos using PicMonkey. You can find her post here: http://www.lifeandlinda.com/2012/07/watermark-your-photos.html

I wanted to say thank you as watermarking also introduced me to PicMonkey which in turn allowed me to improve my photos. The blogging community is such a generous community, which I am glad to be a part of. If you are a new blogger click on the link and you will be so glad you did. 

I shall be joining,


and


 Enjoy the rest of your week and I will see you soon.  Take care,


Best Wishes


Daphne xxx

Related Posts Plugin for WordPress, Blogger...